
Buyer Onboarding
Getting started as a buyer
Once your buyer agent has been created, you can begin using Skyfire’s token-based system. This onboarding flow walks you through how to create API keys, generate payment tokens, and make transactions in the Playground.
Step 1: Launch the Playground
Click “Go to Playground” in the confirmation modal after sign-up. If you skipped this step, you can always access it later by clicking:
- "Learn how to use tokens" or
- “Playground” from the left-hand navigation menu.
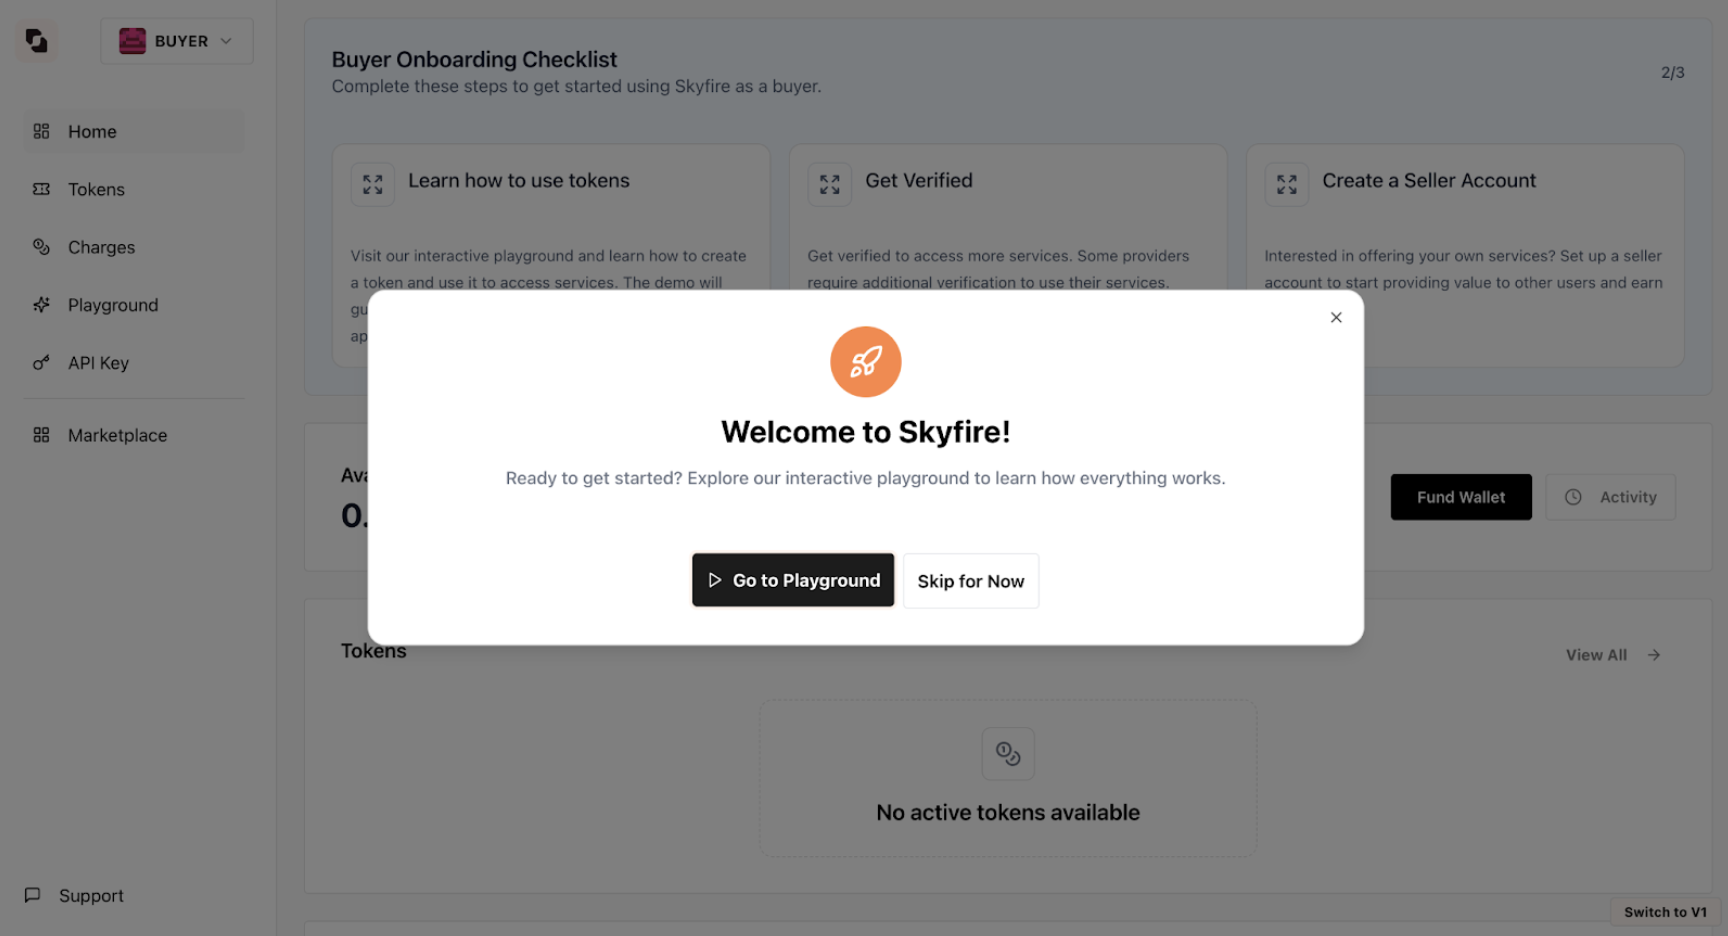
Click "Go to Playground" on the module or use the left-hand navigation menu
Step 2: Create Your Buyer Agent's First API Key
To interact with Skyfire programmatically, your buyer agent needs an API key.
- Click "Create API Key”
- Copy and store the key securely — it will not be shown again in full
- Your agent will use this key to generate tokens and interact with seller services
🔐 Protect this key. Anyone with access can create and authorize payments.

The Playground will prompt you to create an API key. You can also access API Key creation using the left-hand navigation menu
Step 3: Create Your First Token
Skyfire provides a simple seller service to make your first transaction easy. In the Playground:
- Skyfire’s simple seller service is auto-selected
- Token details are automatically filled in:
| Field | Description |
|---|---|
tokenAmount | Maximum amount the seller can charge |
sellerServiceId | ID of the target seller service (pre-filled) |
buyerTag | Optional internal ID for tracking |
expiresAt | Token expiration (between 10s and 24h) |
💡 This token acts like a prepaid debit card, scoped to a specific seller, amount, and timeframe.
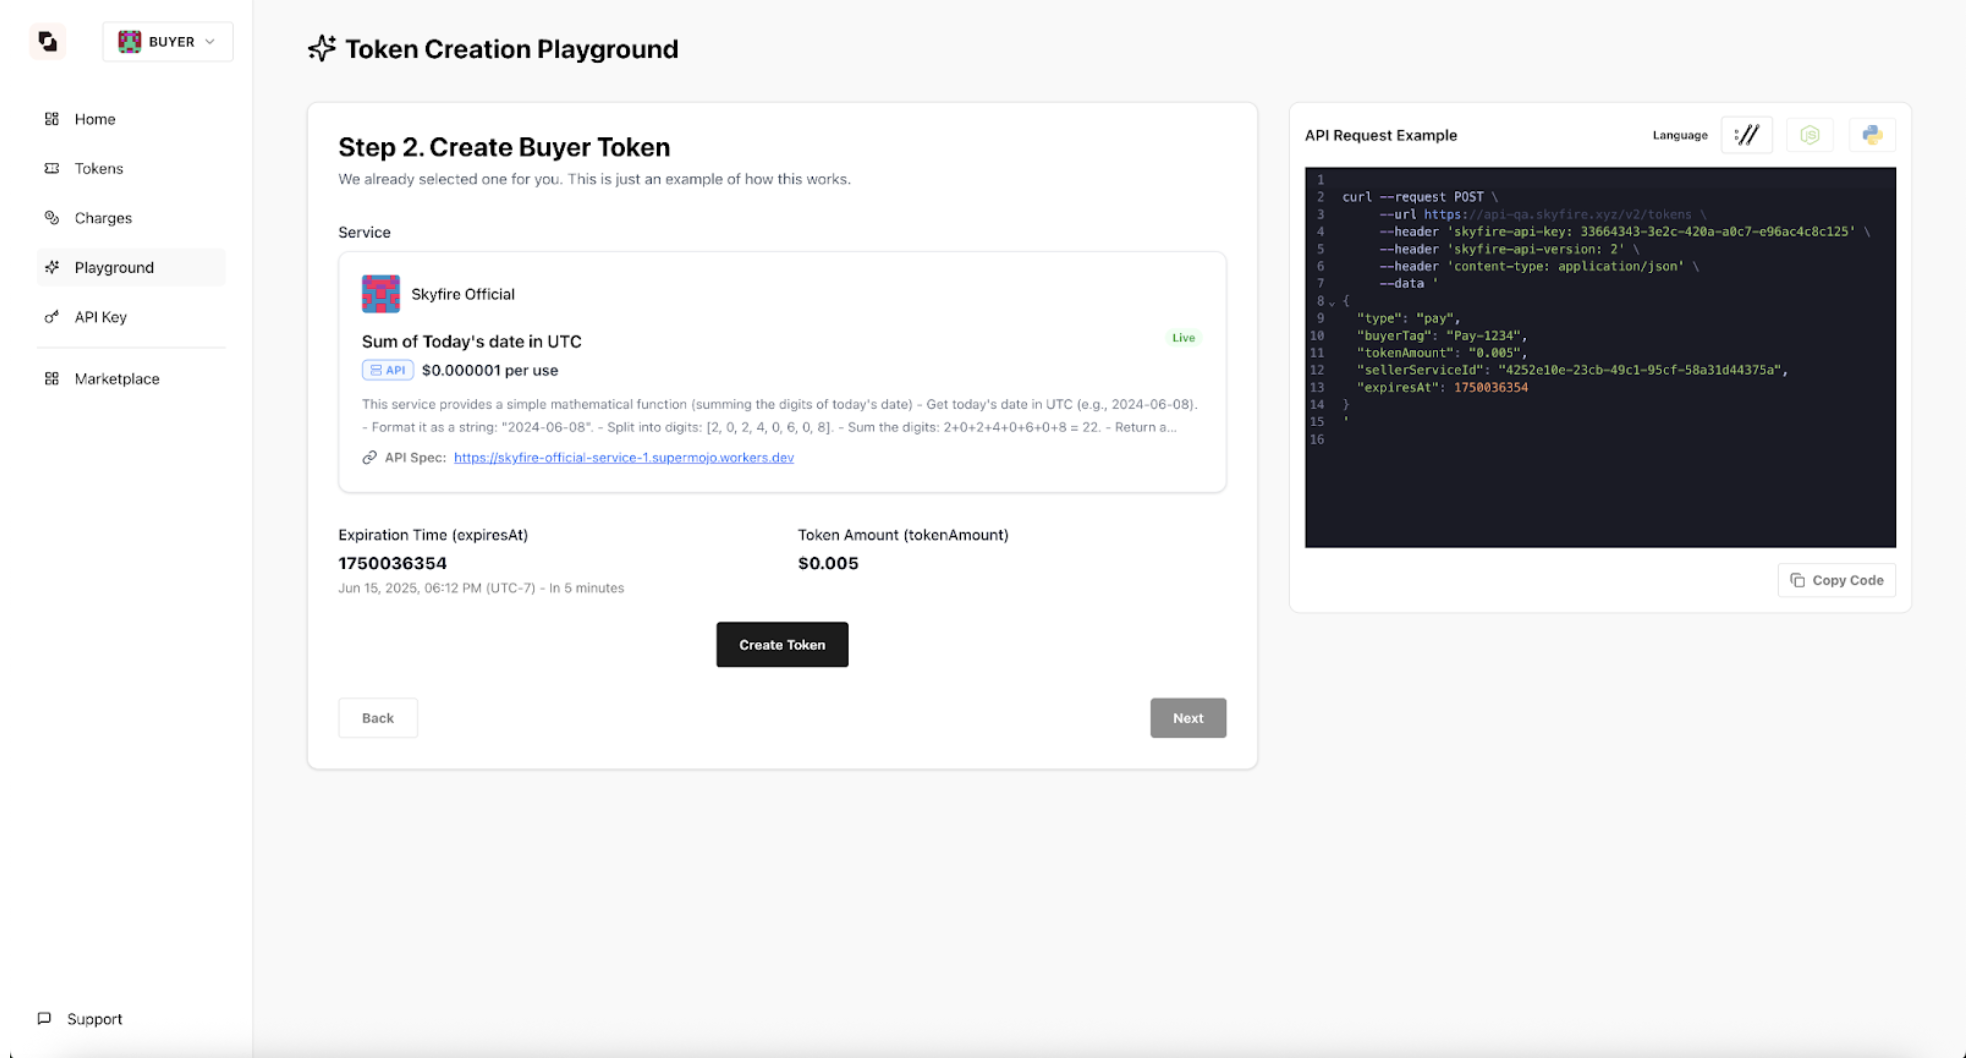
Create your first token by clicking "Create Token". This will generate a valid JWT with the specified balance.
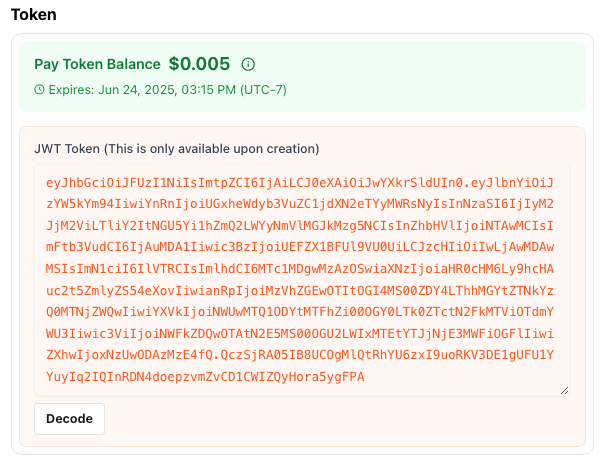
Above is an example of a valid pay token. This is the token a buyer will send directly to a seller. The seller will charge the token up to the amount authorized.
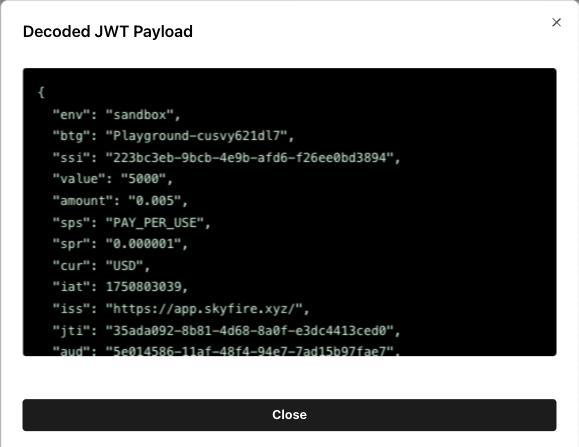
You can inspect the contents of the token by clicking "Decode". Here is the decoded contents of the above pay token. This is the information a seller can see.
Step 4: Use Your First Token
The generated token is passed directly to the seller’s API using their preferred method:
- As a custom HTTP header or
- Inside the API request body
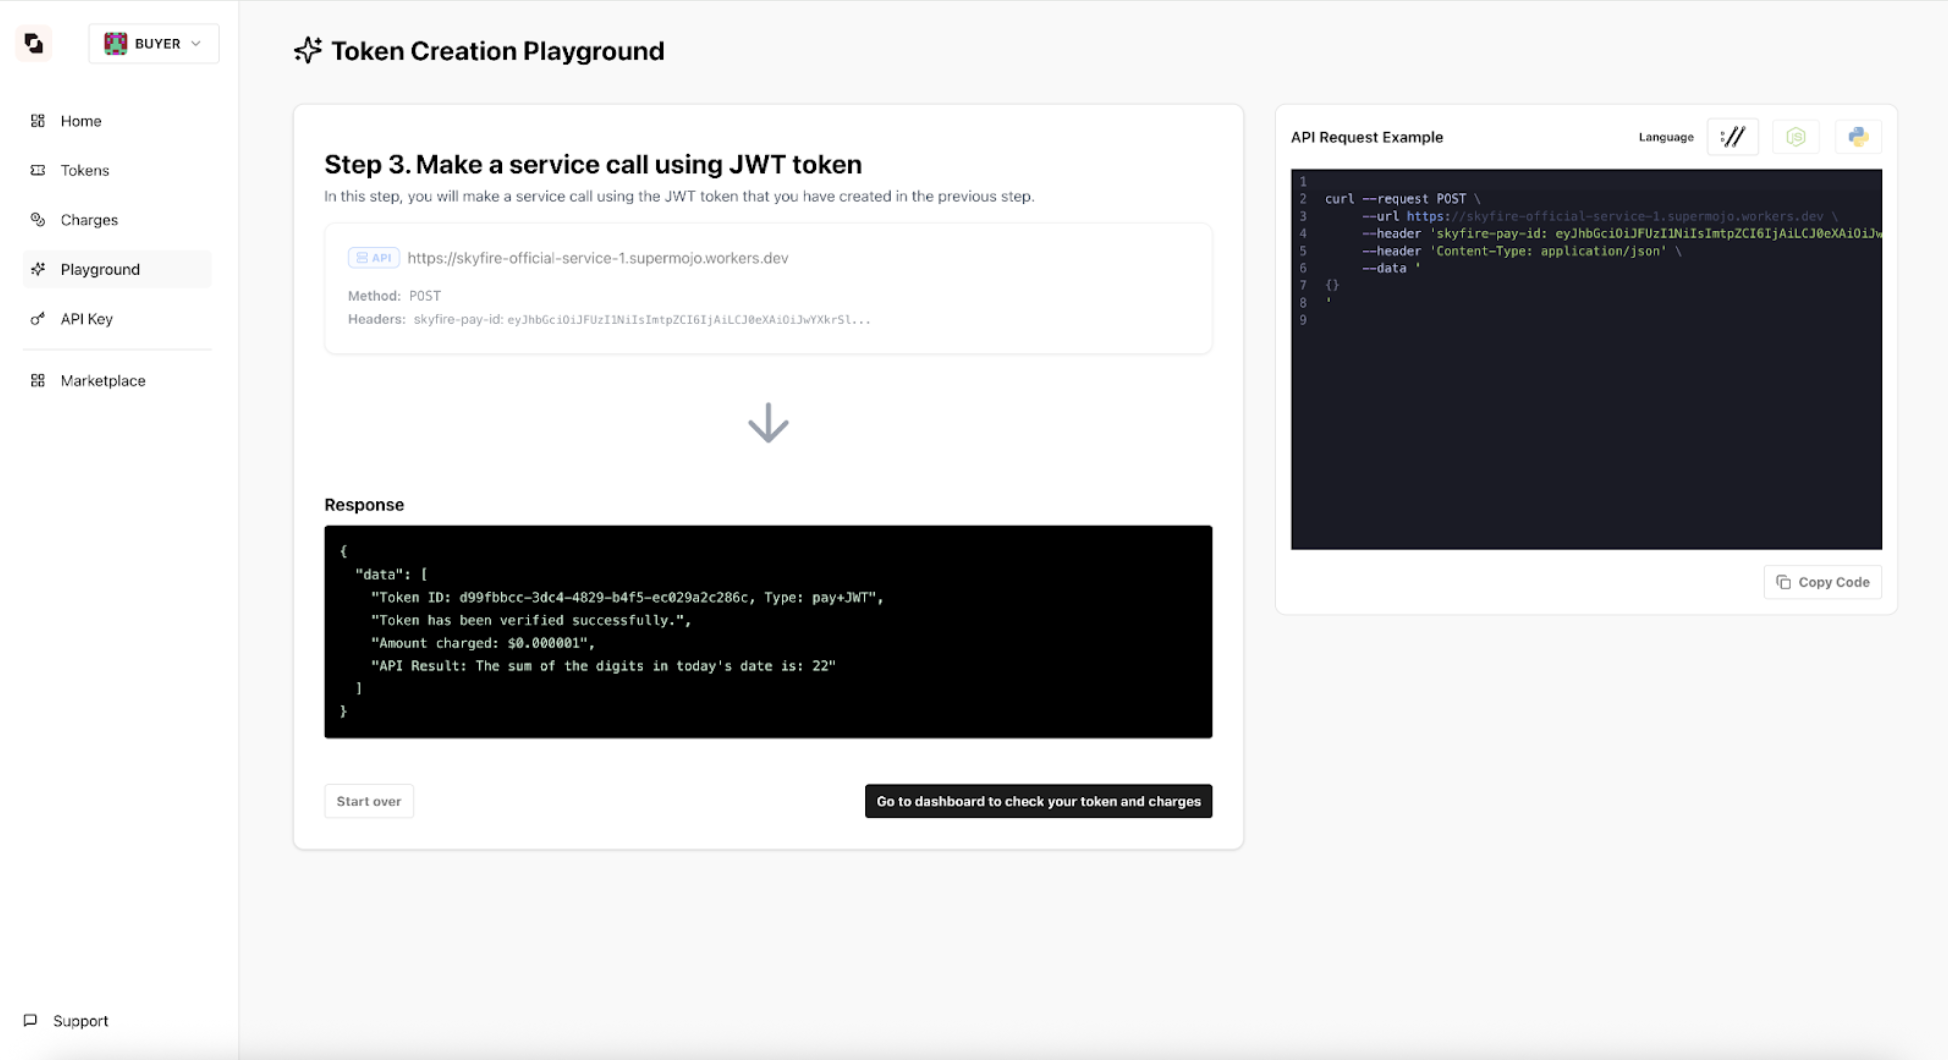
Call the service passing the token directly to the Seller.
How Sellers Handle the Token
On the receiving side, the seller:
- Verifies the token using standard JWKS methods
- Calls Skyfire’s API to charge the token using their seller API key
- Can charge partial amounts — tokens don’t need to be fully consumed in one call
Managing Buyer Credentials and Activity
API Keys
Under your buyer agent settings, you can:
- View and rotate API keys
- Deactivate old or compromised keys
- Create new keys as needed
Tokens
The Tokens tab shows:
- All tokens created by your buyer agent
- Associated seller services and token details
Charges
The Charges tab lists:
- Every charge made against your tokens
- Amounts, timestamps and seller service IDs
🧪 Ready to see it in action? Go to the Playground, create your first token, and see the payment flow between your buyer agent and a seller.